Here at Tenrec many of our clients have content that is really great to read and even better for SEO, but sometimes its length needs to be visually shortened to preserve the page design and legibility. To solve this problem we often employ accordions to show a preview and hide the bulk of some content behind a “show more” button. There are myriad options and plugins out there to show and hide content. Many of them will do the trick, but often our developers find that it’s easier to maintain accordions manually. We’ve cooked up a trick that uses Bootstrap’s Collapse functionality and with a dash of jQuery DOM manipulation to swap the content of the “show more” button for “show less” for an improved user experience.
Below you’ll find an example of our expected outcome. Here’s a Codepen if you want to play around with another demo.


Collapse Demo
Initial Content Shown
In some versions of the game, after the first player is caught or if not any other players can be found over a period of time, “it” calls out a pre-agreed phrase (such as “Olly olly oxen free”, or “All in, All in, Everybody out there all in free”) to signal the other hiders to return to base for the next round. In another version, when players are caught they help the “it” seek out others.
The original term is “All ye all ye, come for free”. Over the years this term has taken on various phrases, the most popular is “Olly olly oxen free”.In one variant, once all hiders have been located, the game then becomes a game of tag where the “it” chases after all the other players and the first person tagged becomes the “it”.In some parts of Australia, the game is called “44 Homes”. The hiders hide until they are spotted by the seeker, who chants, “Forty, Forty, I see you” (sometimes shortened to “Forty, forty, see you”). Once spotted, the hider must run to “home base” (where the “it” was counting while the other players hid) and touch it before she or he is “tipped” (tagged, or touched) by the seeker. If tagged, that hider becomes the new “it.”
In North India, hide-and-seek is played differently – if any of the ‘hiders’ touches the seeker and says ‘Dhappa’, then the seeker has to count again. However, if the seeker sees the hider before they manage to touch him/her and say dhappa, then that hider will be ‘it’ the next round, unless some other hider manages to ‘Dhappa’ the seeker without being seen.But now, instead of doing Dhappa on the “IT”s body, hiders can do dhappa where the “it” counts. The “it” is simply called as “Dianer” (daa-ee-nuh-rr); and the dianers takes a dian.(count)
As you can see from the example above we are toggling some content open and closed/shown and hidden. In the Bootstrap world it’s called “Collapse” and this is the functionality that makes this trick possible. You can Read more about Collapse here. The custom part of this functionality is just a little DOM (Document Object Model) manipulation to change the name of the toggle button to give the user clear expectations on the button’s functionality. As we’ve already said, small UX improvements like this make the internet better for everyone.
Before we Start
Bootstrap and jQuery Installation Setup
Before we start make sure you have a copy of Bootstrap and jQuery pulled down and installed in your project. If you need help installing (aka enqueuing) files in your WordPress theme, see this wpmudev tutorial. Be sure that your Bootstrap CSS and JS versions are the same or you will get funky behavior and errors!
Required files
 You’ll need a place to put your custom Javascript, CSS, and markup. Likely your theme will already have Javascript and CSS/SASS/SCSS files but if not, you’ll need to create them and enqueue them like we did with Bootstrap and jQuery in the previous step.
For markup, this depends on how your theme/site is setup. If you use a WordPress page builder you should be able to put the markup into the page or post text editor. Just be aware that WordPress may strip out HTML that doesn’t match it’s default list of valid elements. This is a good security measure, but sometimes a hassle. Here’s a primer to get you started on extending valid elements. Otherwise if you are using a pagebuilder like Elementor Pro has its own HTML widget and if you are editing the PHP directly it’s no sweat.
Let’s do it!
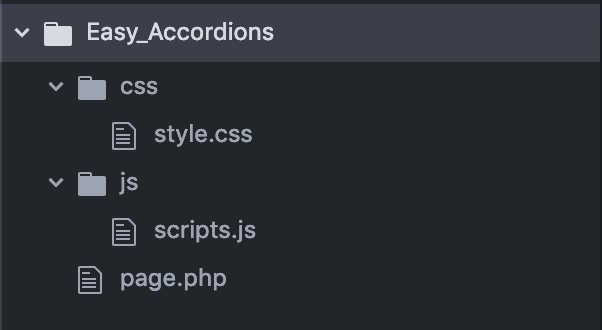
First we will need a custom Javascript file. As you can see from the folder structure image above it is a good idea to organize files by type. Make sure to keep your Javascript files organized into a /js/ folder. To add the custom javascript you will need access to your theme files. There are a number of different ways to access the files and it is best practice to use a version control system like Git or Subversion. You may also access the files via FTP. We like to use FileZilla. You will need your site’s host address, login name, and password. You can often find this information in the cPanel of your site or through your host. Here is a beginners guide to FTP with FileZilla. If you must edit files directly on your live site just make a backup copy of the file, directory, or your theme itself.
1. The Markup
Below is an example of the button link. The class, href, and aria-controls will be replaced with your custom reference names. The class is how Bootstrap finds the element to be hidden/shown and the href and the aria-controls target the element to be collapsed on the click event.
<a class="see-more-toggle" data-toggle="collapse" href="#collapse2019" role="button" aria-expanded="false" aria-controls="collapse2019">Show More <i class="fa fa-angle-down"></i> {insert content to be hidden} </a>
2. The jQuery
This is our dash of DOM Manipulation. Below is the Javascript that swaps out the button html content. The function gets the initial state of the button html and toggles it with ‘See Less ><i class=”fa fa-angle-up”></i>;’
clickToggle('.see-more-toggle.one');
  clickToggle('.see-more-toggle.two');

  function clickToggle(element){

    //Set initial html content of button
    const init_str = jQuery(element).html();

    //Click Event
    jQuery(element).click(function(){
      var $this = jQuery(this);

      // get button's current html
      const current_str = $this.html();

      //Set short timeout to avoid async weirdness
      setTimeout(function(){
        $this.html(function(){

          //If, on click, button html matches initial value set it to 'See Less '. You can change this string value to what ever you'd like
          if (current_str === init_str) {
            btn_text = 'See Less ';
          } else {
            btn_text = init_str;
          }
          return btn_text;
        });

        //Adjust this value below to change the delay of the html change
      }, 1000)

          return init_str;
        });
  }
3. The CSS
You can alter the duration of the showing/hiding transition with these CSS rules:
//CSS
//Boostrap 4
.collapsing {
  transition: all 1s ease-in-out;
}
//Pre Bootstrap 4
.collapse {
  transition: all 1s ease-in-out;
}
Conclusion
Alright! We did it! We covered a lot of ground and we now have a functioning easily customizable method for showing and hiding content. We hope that you have found this tutorial helpful and that you find this trick useful. If you have any questions, comments, praise, or rants feel free to drop us a line at info@tenrec.com. Happy coding 🙂